


Next Gen Family Shop
For Bambulab 3D Printer Tool Head Cutter Replacement Accessory Compatible with X1 P1 A1 A1 Mini Filament Cutter for Bambu Lab
For Bambulab 3D Printer Tool Head Cutter Replacement Accessory Compatible with X1 P1 A1 A1 Mini Filament Cutter for Bambu Lab
Couldn't load pickup availability
SPECIFICATIONS
Color: Silver
Cutter Thickness: 0.5mm
High-concerned chemical: None
Item Type: Stainless Steel Blade Separating
Material: Plastic, Metal
Package Weight: 20g
A1 mini cutter is used to cut off consumables to prevent consumables from clogging.
Please visit the official wiki for installation steps and search for the keyword "A1 mini cutter" (https://wiki.bambulab.com)
When to change
If there is a problem with the supply cutting or the blade becomes dull, please refer to the following guide. As the time of use increases, the blade will decrease sharpness.
To maintain cutting performance, it is recommended to change the cutter every 10-15 rolls of consumables (or less).
After about 5,000-7,000 consumables are cut, the blade may become dull, but it usually does not deform. Please refer to the figure below.
If you encounter AMS filament shrinkage problems, it is recommended to replace the blade to ensure optimal results. The sharp blades cleanly cut the filament and avoid problems in operation.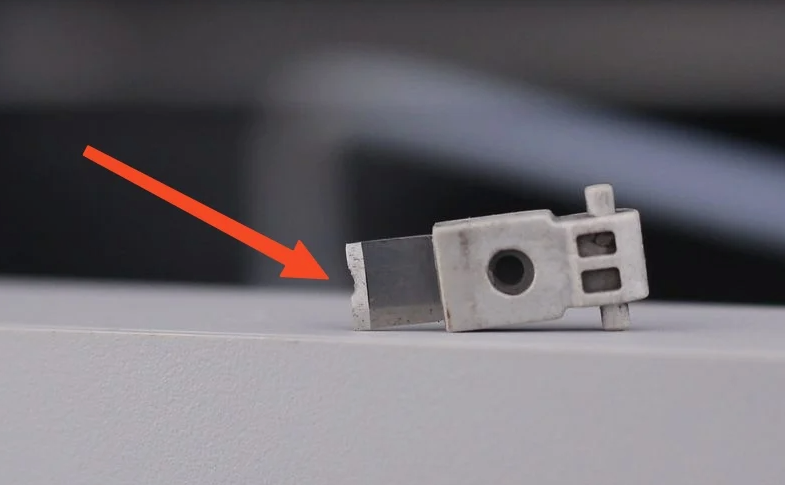
Common issues that require replacing consumable knives include:
Consumables are not cut cleanly
Wear of cutting blade
Operation Guide - Disassembly
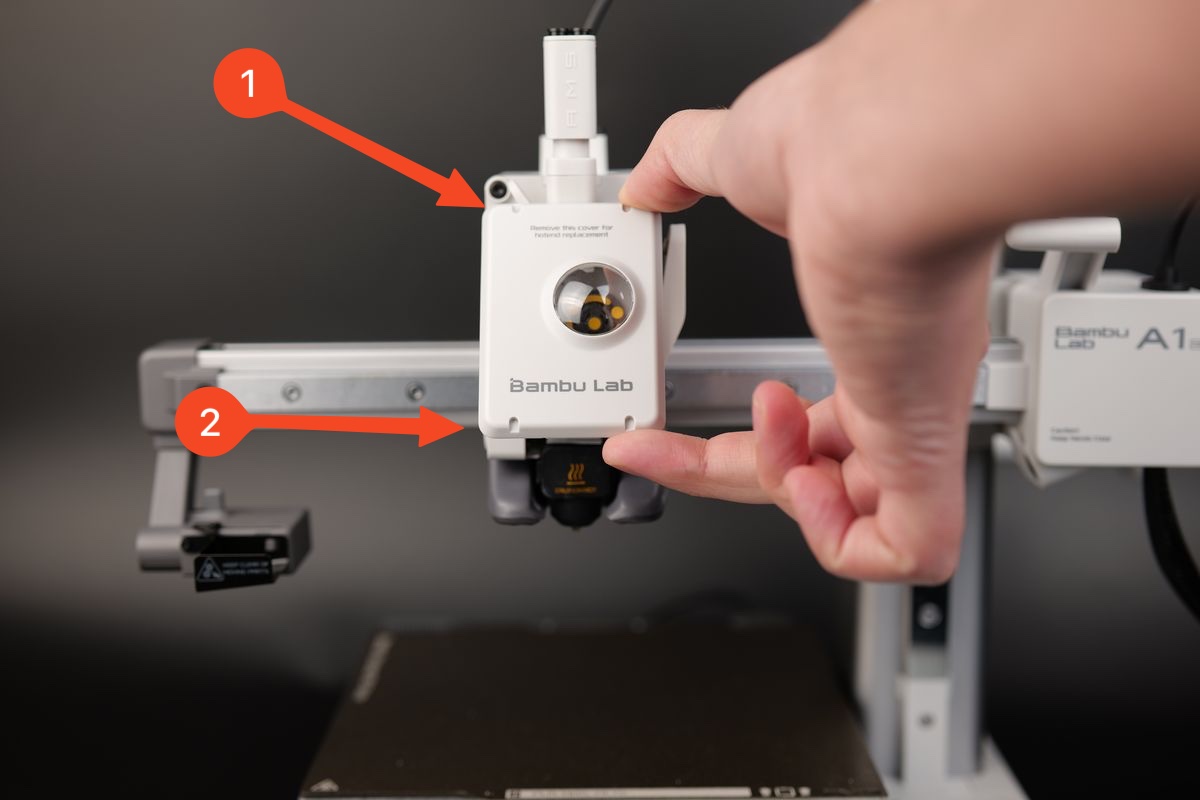
1. Remove the front cover of the tool head
Grasp the bottom of the front cover and gently pull it forward to release the buckle that holds the front cover in place, making it easy to remove the front cover.
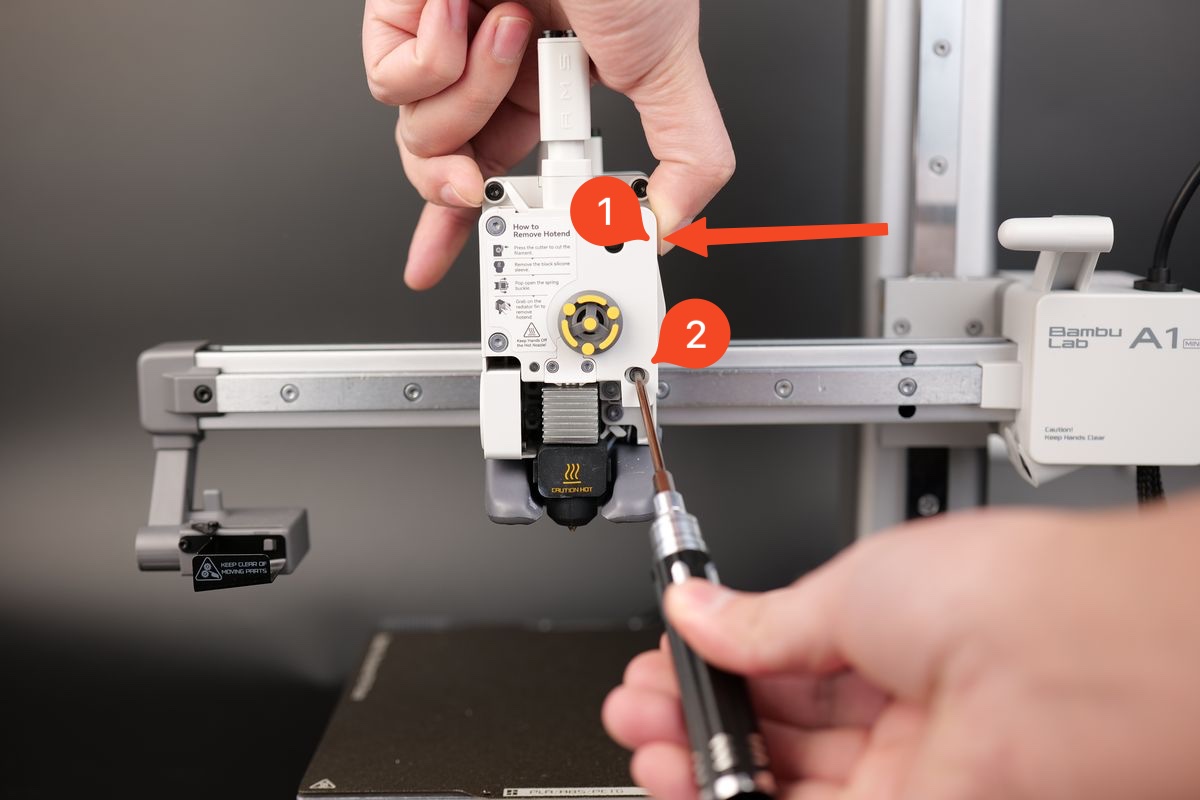
 2. Release the handle of the cutting knife
Press and hold the cutter handle while using a screwdriver to remove the screw. Once the screw is completely removed, gently release the cutter handle.
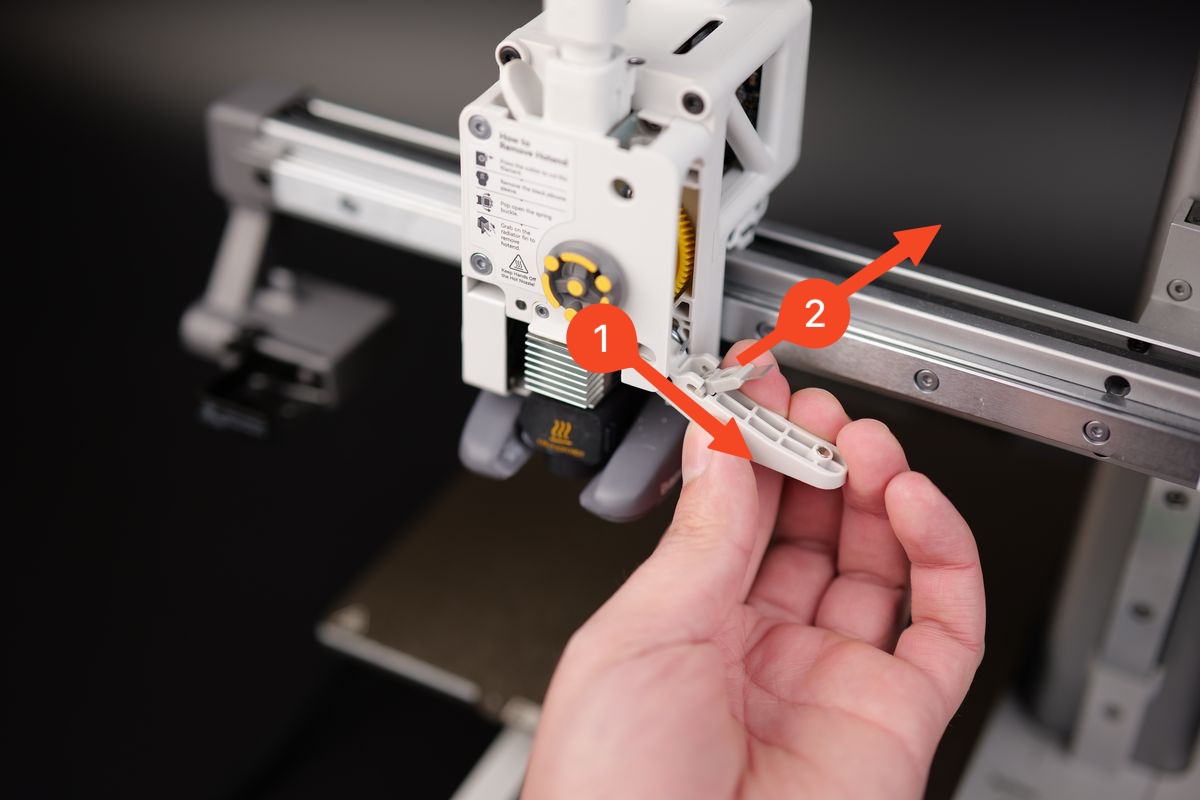
 3. Remove the cutting blade
Gently push the blade towards the lower right as shown in the diagram, and then remove the blade towards the upper right.
Operation Guide - Installation
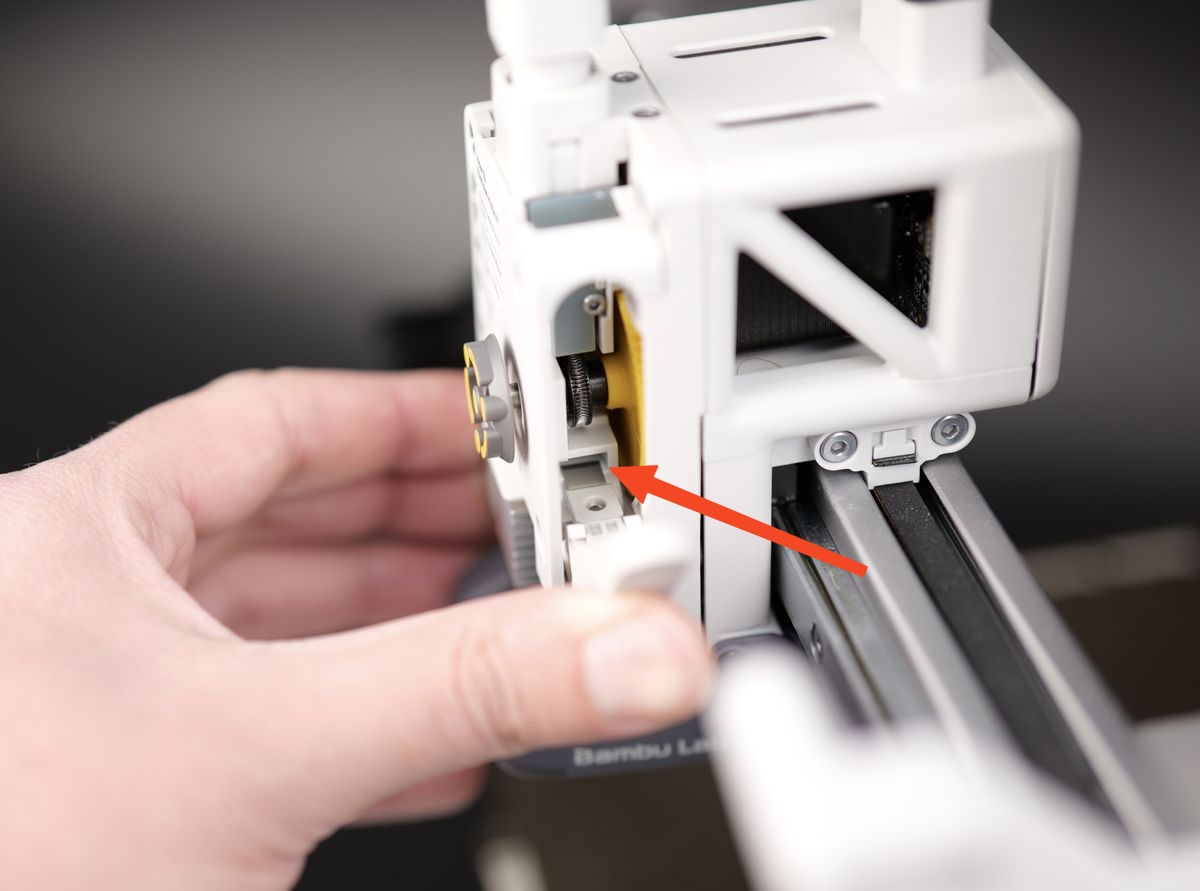
1. Install the cutting blade
Installing a new cutter is very simple. Just align the cutter with the installation slot and insert it into place. Then, gently push in the direction shown in the figure below to secure the cutting blade in place.
 2. Fix the position of the cutter handle
After installing the blade in the fixed position on the cutter handle, ensure that the blade is aligned with the hole of the extruder.
 Before re fixing the screws, please grip the cutter handle tightly and maintain its position. When tightening the screws, please be careful not to apply too much force to prevent the occurrence of anti-skid threads.
3. Install the front cover of the tool head
Align the top buckle of the front cover of the tool head and gently press down on its lower part. After ensuring proper installation, you will hear a crisp sound.
 4. Verification
To ensure proper functioning, please press the blade handle several times and ensure smooth movement, allowing the handle to return to its initial position. This will ensure smooth operation during use.


